Installation
In our guide, we will show you step by step instructions on how to install our WordPress theme for beginners. Below you will find two ways to install a WordPress theme.
Installation via Administration Panel
If Masjid files are downloaded from your Themeforest account, you can start an installation using WordPress administration panel.
Follow steps below to install the theme:
- Step 1 - Once you’ve logged in to your administration panel, go to My Sites > Network Admin.
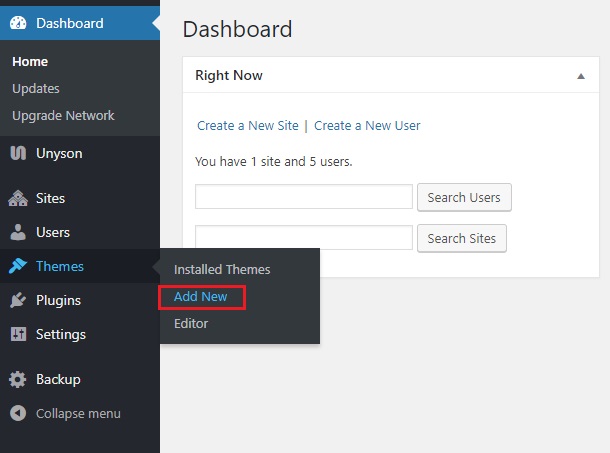
- Step 2 - Then click on Themes > Add New, you will be directed to a page where you can choose available themes.
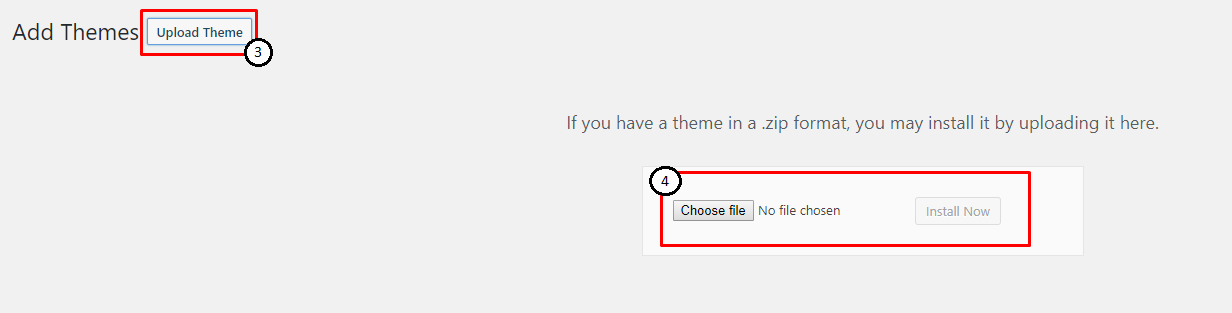
- Step 3 - Once directed to the page, on the upper left side of the screen click on Upload Theme button.
- Step 4 - Choose the Masjidtheme.zip file from your computer, then click Install Now.
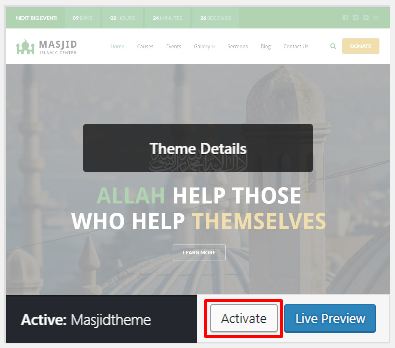
- Step 5 - Click on My Sites then go to Appearance > Themes and Activate Masjid.
- Step 6 - After activating Masjid, you will be sent to Theme Installation Instruction steps. By following this steps you will be asked to install required plugins, activate them, and import demo content (required).
Common Install Error: Are You Sure You Want To Do This?
If you get the following question message when installing Masjidtheme.zip file via WordPress, it means that you have an upload file size limit. Install the theme via FTP or call your hosting company and ask them to increase the limit.
Installation via FTP
To install Masjid WP via FTP, follow steps below:
- Step 1 – Unarchive Masjidtheme.zip file
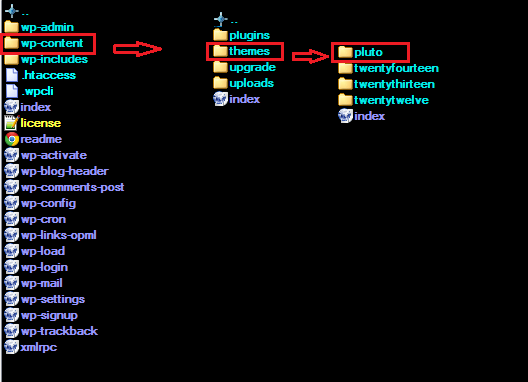
- Step 2 – Access your host web server using FTP client
- Step 3 – Find directory wp-content > themes
- Step 4 – Put folder Masjidtheme in directory wp-content > themes
- Step 5 - Go to your WordPress administration panel, navigate to Appearance > Themes then activate Masjidtheme.
Learn more: