Need help in using our WordPress theme?
Tags are meant to describe specific details of your posts. They are the micro-data that you can use to micro-categorize your content. Tags are not hierarchical.
Adding tags to a Events post would make it easier to relate a post with another post even if the categories are different.
To create a Tag for a Events, follow these steps:
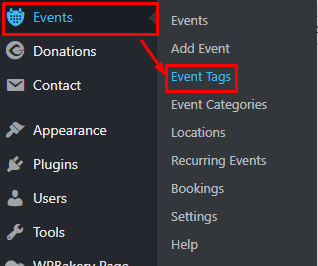
Step 1 - Navigate your Dashboard to Events > Event Tags. You will see the Event Tags page.
Step 2 - In the page, find the Add New Tag area. Add All the necessary information.
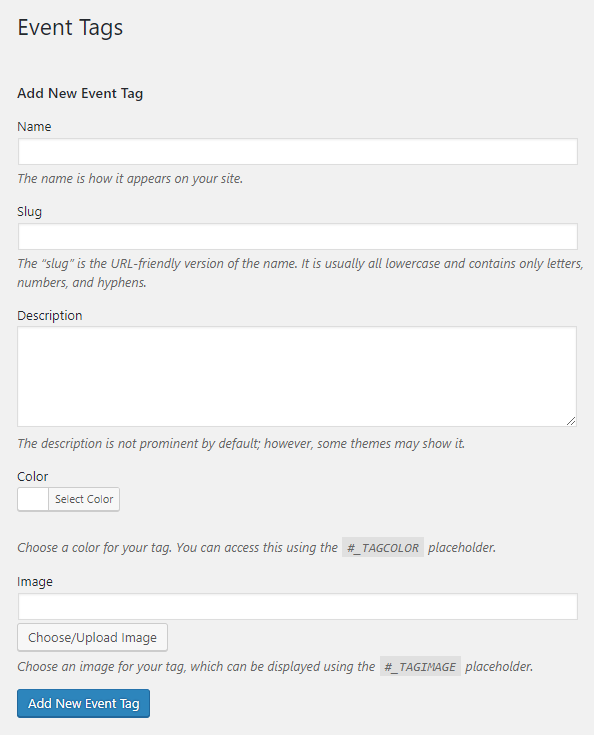
- Name - The name of the tag.
- Slug - The URL-friendly version of the name. Usually all lowercase.
- Description - Description of the tag.
- Color - Add a color scheme for this event category.
- Image - Add an image to represent the category. This image will be used by the Event Tags element to display Event items by category.
Step 3 - Once done filling out the information of the tag, click on Add New Tag button to save.
Note
Adding a tag may affect the tags from other component of the site.
To delete a tag, navigate your Dashboard to Events > Event Tags.
In the Event Tags page, you will see all the created tags.
To delete a tag, you have two options:
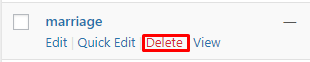
Single Delete - Hover your mouse pointer on the tag that you would like to delete. You will see a Delete option pop-up. Click on Delete to delete.
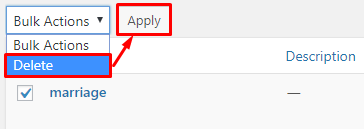
Multiple Delete - To delete multiple tags, click on the box beside the tags you would want to delete. Then click on the drop-down box for Bulk Actions and choose the Delete option. Click on Apply button to delete.
Note
Deleting a tag may affect the tags from other component of the site.