Need help in using our WordPress theme?
To create a new Donation, follow these steps:
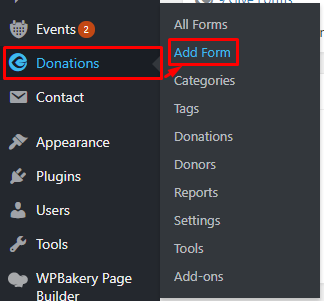
Step 1 - To start creating an Donation, on your Dashboard navigate to Donations > Add Form. The Add New Donation Form page will show.
Step 2 - Once your in the Add New Donation Form page, you can add details about the Donation like title, pictures, videos, donation amount, etc., to help with the promotion of the Donation.
Step 3 - These are the needed information for the Donation, you can add the details.
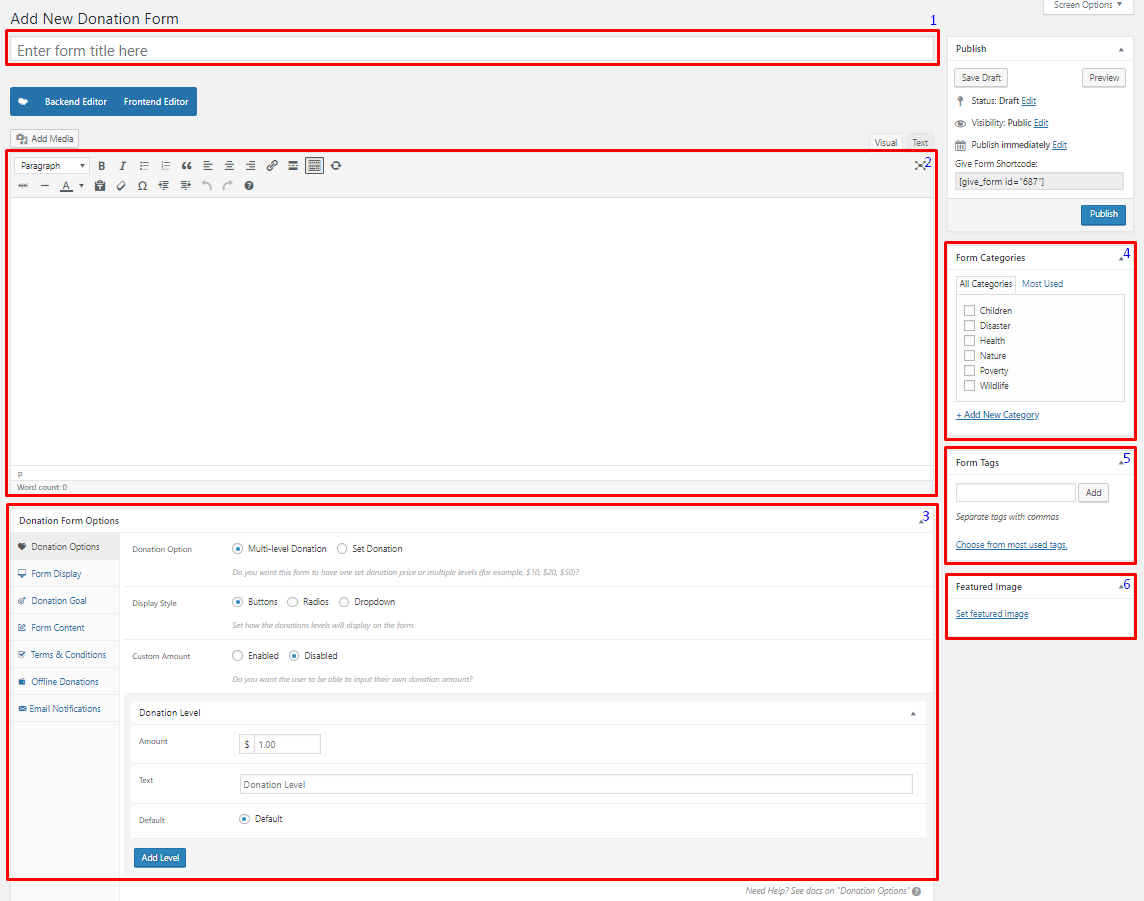
Title - The name of the Donation item.
Editor container - You can add text detail/information, images, or videos about the Donation.
Donation Form Options - Set the details and format of the Donation.
Donation Options
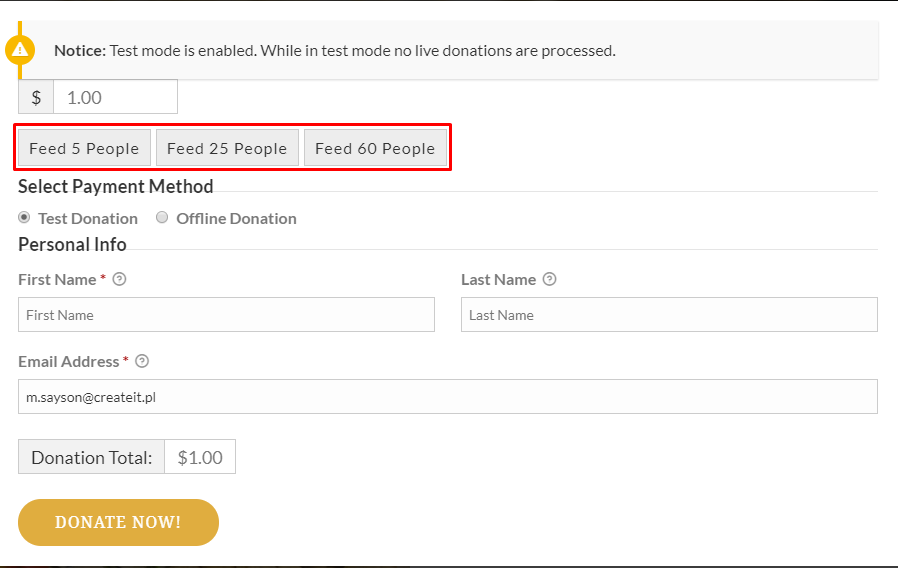
Donation Option - Set the price and level of the possible amount donations. Choose from: Multi-level or Set Donation
Multi-level Donation - Create a multi optioned donation for the form.
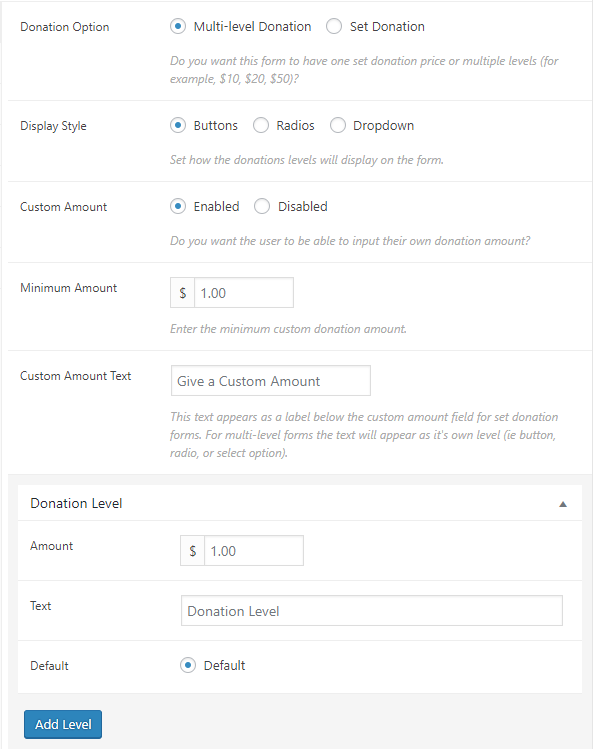
Display Style - How the level of the donation is displayed.
Custom Amount - Option to allow users to input their own donation amount.
- Minimum Amount - Set the minimum amount that the user can donate.
- Custom Amount Text - Text to describe the minimum amount.
Donation Level
- Amount - Donation amount for this level.
- Text - Name of the donation level.
- Default - Option to set the donation level as the default level.
Set Donation - Set a single donation for the form.
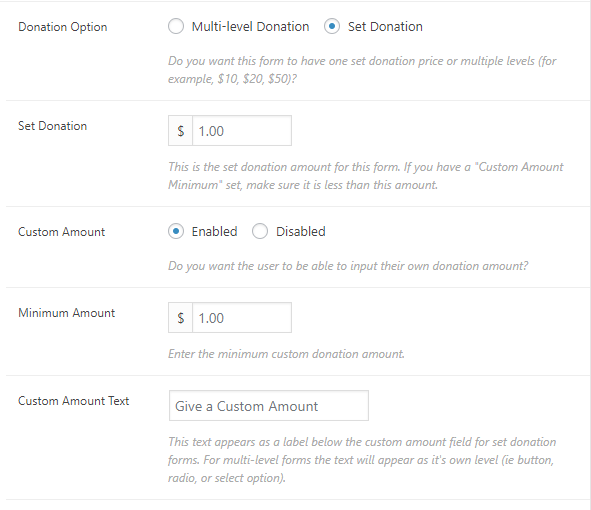
Set Donation - Donation amount set for the form.
Custom Amount - Option to allow users to input their own donation amount.
- Minimum Amount - Set the minimum amount that the user can donate.
- Custom Amount Text - Text to describe the minimum amount.
Form Display
- Donation Option - How the donation information of the form is displayed.
- Submit Button - The text/label inside the button.
- Default Gateway - What payment gateway is used for the form.
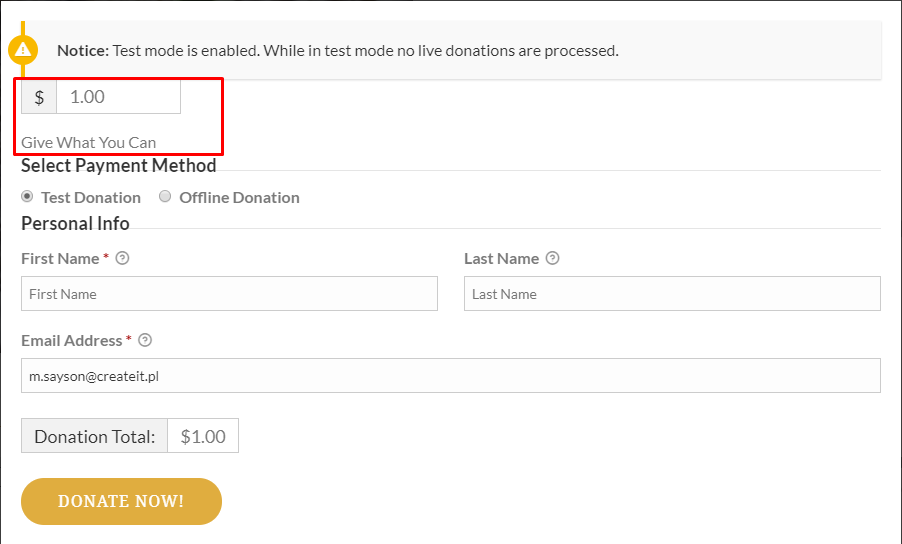
- Guest Donations - Option to allow guest users to donate.
- Registration - Option to display the Registration and/or Login link if user is a non-logged-in user.
- Floating Labels - Option to allow floating labels.
Donation Goal
- Donation Goal - Option to enable donation goal.
- Goal Format - The display format of donation goal.
- Goal Amount - The amount you want to reach for this form.
- Progress Bar Color - The color for the goal progress bar.
- Close Form - Option to automatically close the donation form once donation goal is reached.
Form Content
- Display Content - Option to add details about the donation form.
- Content Placement - Location where the donation details are shown.
- Content - Content for the donation details.
Terms & Conditions
- Terms and Conditions - Option to require the user to accept terms before donating. Choose options: Global Option, Customize, or Disable
- Agreement Label - This will show when Customize option is enabled. Label for the terms.
- Agreement Text - This will show when Customize option is enabled. Content for the terms.
Offline Donations
- Offline Donations - Option to enable offline donation for the form.
- Billing Fields - This will show when Customize option is enabled. Enable the billing details section for this form’s offline donation payment gateway.
- Donation Instructions - This will show when Customize option is enabled. Content for the instructions.
Email Notification
- New Donation - Options for Email details for new donations. You can edit the email by clicking Custommize.
- Donation Receipt - Options for Email details for donation receipt. You can edit the email by clicking Custommize.
- New Offline Donation - Options for Email details for new offline donations. You can edit the email by clicking Custommize.
- Offline Donation Instruction - Options for Email details for offline donation instruction. You can edit the email by clicking Custommize.
Excerpt - Short summary of the information about the Donation.
Form Category - A broad detail that can categorize this Donation with other Donations.
Form Tags - Specific details that can be use to group this Donation with other Donations.
Featured Image - The Image shown in the listings/pages.
Step 4 - Add all the needed details and descriptions for the Donation, Once satisfied click on Publish button.
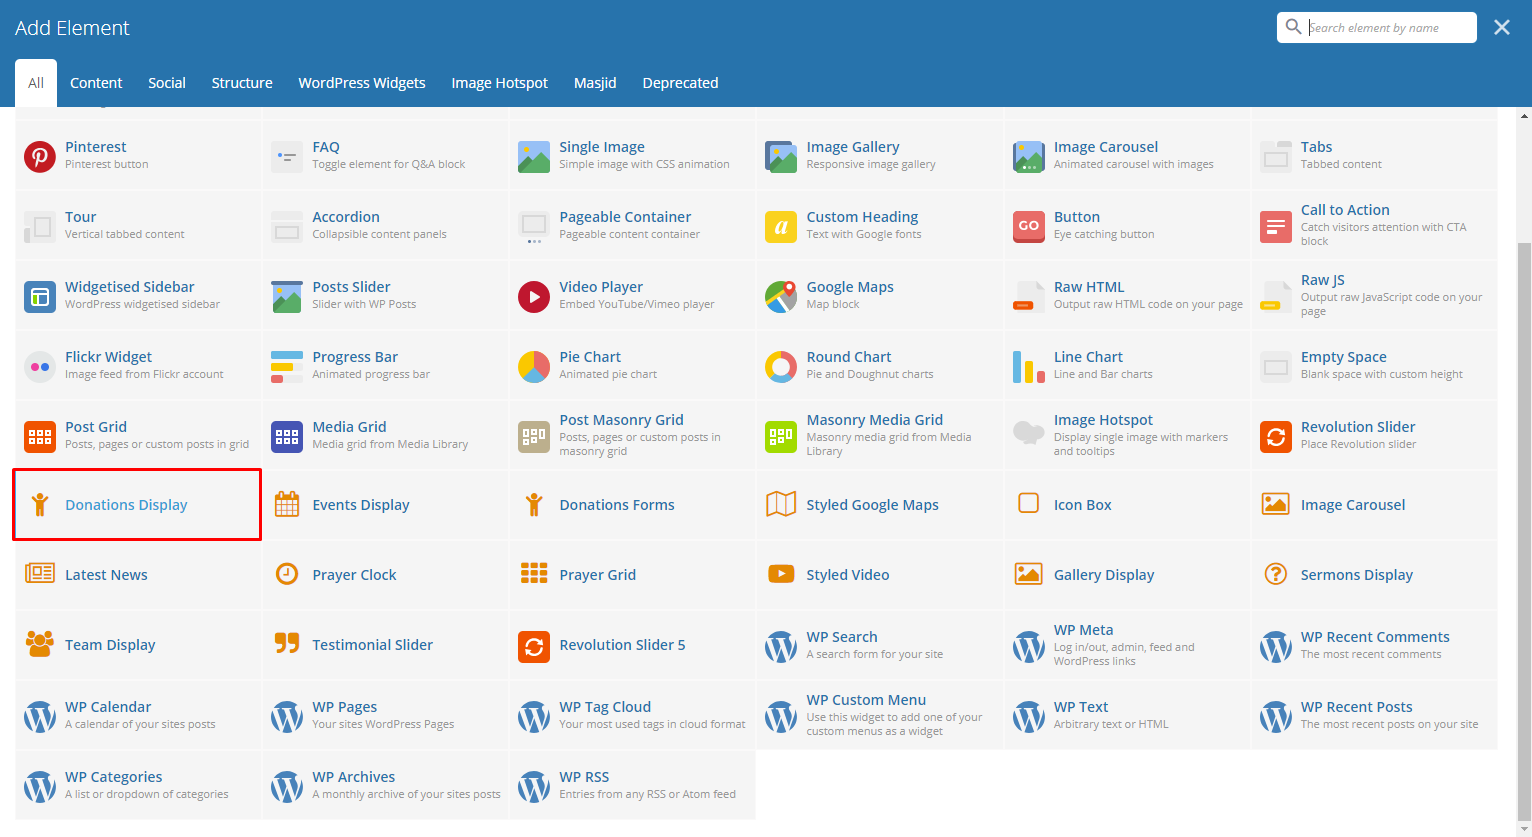
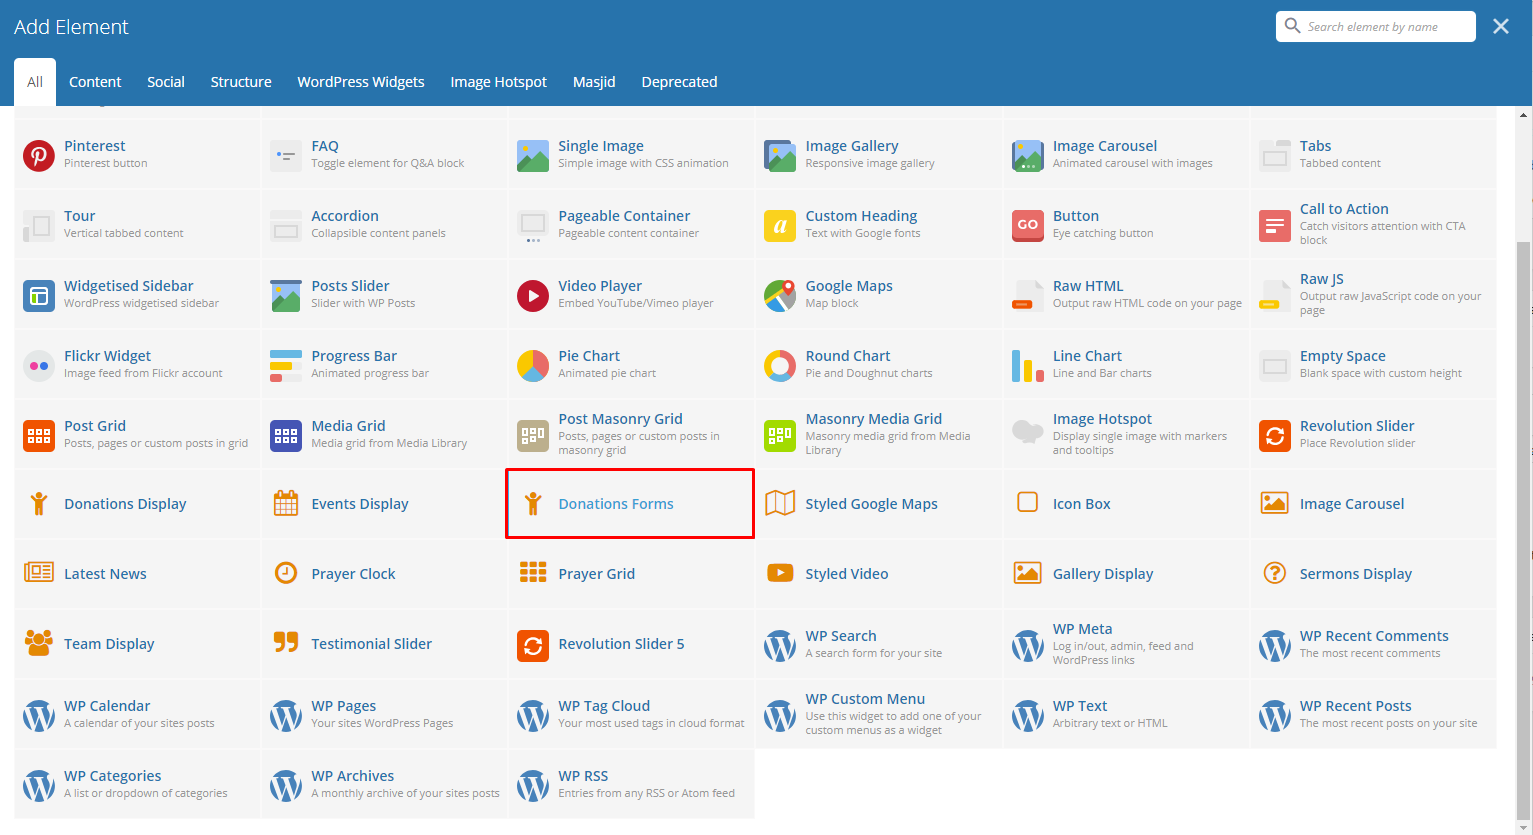
To add Donations to a page, elements in the Visual Composer is used: Donations Display and Donation Forms
|
|
This is the element that will add a Donations on the page. For more information about these elements, go to Masjid Custom Shortcodes > Donations Display or Masjid Custom Shortcodes > Donation Forms.